Preserved from CalaisTurbo (partial recovery). Original authors and dates are shown; archived members are not current Holdcom accounts.
24-08-11, 05:08 GMT+10#181 UPDATE: Panel, Paint and Plastic
Re-assembly of the bumpers to the car commenced Tuesday. The parking strips that need to be located on the inner side of each bumper have now taken their place and the panelbeater was looking for a way to thread the wire into the boot without drilling any holes. Front bumper is pretty straight forward with regards to the wiring feed.
If all goes well the car should be done by Thursday then its onto the home straight with the internal cabin modifications which will begin next Tuesday and hopefully will be done by the time I get back on the 16th.
I was having some thoughts about the parking sensor LEDs and was thinking of getting them moulded into the rear view mirror. Seems the most logical place for them to be when reversing. However I have to make sure the aesthetics look right for this. So a bit of photoshopping over the next few days.
Currently we're trying to troubleshoot the TomTom cradle device. It needs to spring up but slowly like the old cassette decks in 1980s boom boxes - it's got to be a smooth up and down mechanism so just working some designs from the pivot part of the cradle. Should get that sorted hopefully in the next few days.
In the meantime, the cradle is being fibreglassed in place and we're moulding black ABS plastic on the inside of the cradle so when it opens, you can't see any gaps behind the TomTom.
But the biggest hurdle is getting a third party ready to do the dash repainting and centre console at a certain date. Fingers crossed it can all be arranged in time.
Some original photos have not been recovered yet.
0 likes
24-08-11, 21:56 GMT+10#182 If this doesn't make it into a mag of some sort I'll be very surprised, everything is very well thought out and getting it all done from the other side of the world is amazing in itself.
by the way how much did the re-galvanizing cost? pm if you like
0 likes
24-08-11, 23:50 GMT+10#183 hah, that reminds me i was supposed to do that cover for the tomtom thing
Forgot about that for a couple months there
Some original photos have not been recovered yet.
0 likes
25-08-11, 04:20 GMT+10#184 Quote:
Originally Posted by bsakid
[View Post]
If this doesn't make it into a mag of some sort I'll be very surprised, everything is very well thought out and getting it all done from the other side of the world is amazing in itself.
by the way how much did the re-galvanizing cost? pm if you like
I think it was $150 all up. We literally sent them a bucket of bolts and a few other bits. Well worth the effort.
I'm a Project Manager / Analyst by profession so the planning and thinking is second nature BUT it falls flat when you haven't got the right people to do the work. I struggled and threw a pile of cash to idiots for the first couple of years to be disappointed many times. Guys from one place even stole parts off my car (swapped new for old) - you name the disappointment - I've suffered it.
But now, I'm lucky that a good mate of mine local is doing a bit of the running around and I have a couple of brilliant tradesmen...actually I'll call them "artistes", in their field, who actually will go that extra mile for me. I cannot thank them enough. Other than that, heaps of phone calls almost on a daily basis, sometimes at 2-3am my time, text messages and emails with photos back and forth with comments and instructions.
But not to forget the guys on this forum as well. Your help in assisting me troubleshoot some simple things because I'm on the other side of the planet and away from my car and offers of assistance have been invaluable.
BTW: UPDATE - Car to be picked up Friday.....Phase Two virtually done.
0 likes
25-08-11, 10:51 GMT+10#185 I think what impresses me the most is your ability to resource things that normally don't get any attention. Like building the plastic flip mechanism for the TomTom, or getting exactly the right coloured LEDs for the gear indicator (which I have a massive hard on for).
0 likes
28-08-11, 01:43 GMT+10#186 UPDATE: Back from the dead....almost....
Phase Two is all but over. The re-paint and touch up turn out pretty good. However a few blemishes and a very un noticeable dent (but something that would annoy me going forward) means that EVILPET spends this Monday back at the panelbeaters.
Custom strut covers and a NOS under bonnet insulator to be fitted when I'm back but everything else is done. Oh yeah - the custom battery box that Briffa made first time around need to be fitted once I buy another Cyclops battery around Christmas time in time for Motorvation.
I want this absolutely perfect.....
Now to finish the cabin.....
I thought there were a lot of imperfections with the paint and now the engine bay. Turns out its just the result of a mirror finish paint and plastic.
Some original photos have not been recovered yet.
0 likes
28-08-11, 23:39 GMT+10#187 fk yes, cant wait to finaly see this at motorvation
0 likes
01-09-11, 18:26 GMT+10#190 oh sh** thats so damn sexy
thats some real thought gone into this man
im an auto elec my self and wouldve never bothered with this on my own car time is just such an issue for me and theres you doing all this from uk
real inspiration
0 likes
01-09-11, 23:25 GMT+10#191 Absolutely awesome, top effort, something I'd always thought about, but had no idea where to start!
0 likes
02-09-11, 01:30 GMT+10#192 UPDATE: The Return of EVILPET....
Phase Two is complete. Car is now in Phase Three which is to complete the cabin enhancements. Phase Four is the boot setup with revised subs and a secondary battery (October 2011) - I literally want a "Plain Jane" functional boot but am going to kick it up quite a few notches to what Holden brought out in 1986-88 on the VL. Been thinking about it for a few months now, mulling some ideas around and taking some inspiration from recent models of BMW, Mercedes and of course, Holden for the look and design. Stay tuned....
Thanks for the comments guys.
UPDATE: Digital Speedo
If it's the last thing I do I'm going to make this work.
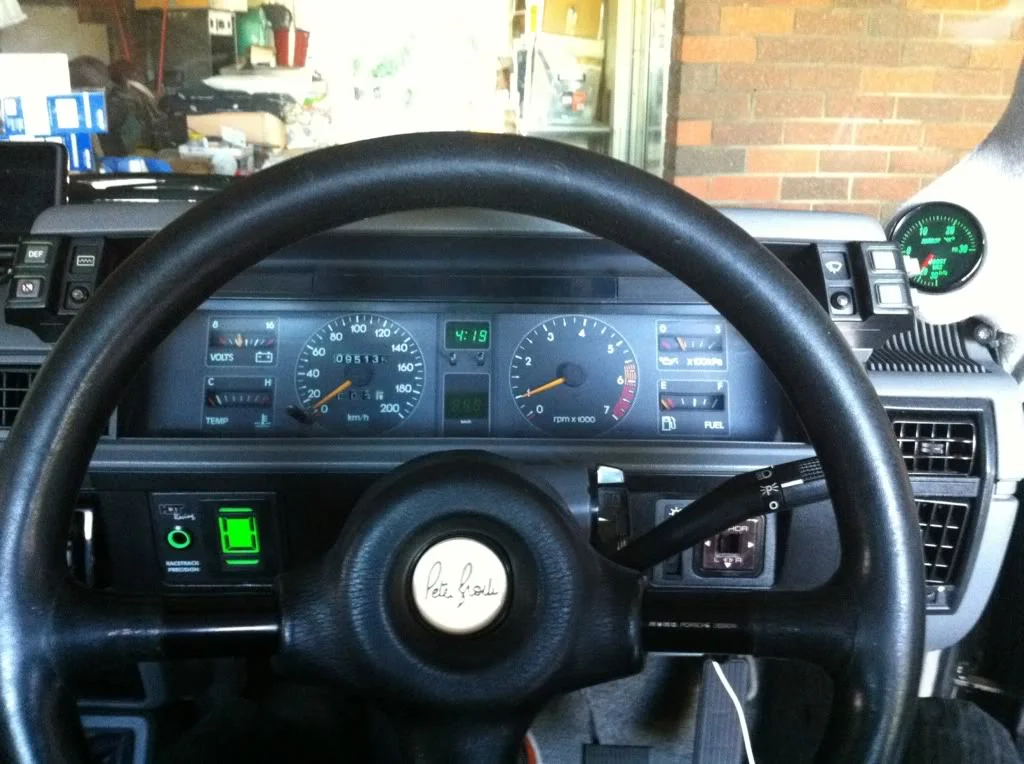
A recap from earlier in this thread - We got the digital speedo and speed alert to work earlier in the year and then fitted the whole thing to the car, raised it onto stands and calibrated it. However we used some LEDs from Jaycar because the ones that I was supplied by the company in China were the incorrect polarity. Also the pin configuration was different at the back of the LEDs for the Jaycar ones BUT I needed to test whether the whole setup worked before I headed back to London.
As you can see - it worked - beautifully too. And is calibrated to the VL in a plug and play set up.
Ok, so I got a new batch made up (finally after having supplier / manufacturer issues) and this week we soldered the new LEDs in place and.....NADA - NOTHING - ZIPPO.....so now going through the soldering configuration again to see if we've missed anything. I'm sure we have overlooked something.
We'll sort it.
BTW: IF you're wondering how the speedo works it increments by 5km units then settles on the constant speed after initial acceleration. I literally had my foot on the floor whilst the car was on stands to get it to 100km to set the speedo needle to the digi-speedo program and had the car up to 170km (yes, whilst on the stands). The digital speedo worked a treat!
Some original photos have not been recovered yet.
0 likes
02-09-11, 01:58 GMT+10#193 This has to be the best thread on any forum i love my car builds regardless of holden, ford,Nissan but i have to say your attention to detail and your patients and comitment.
WELL DONE MATE
0 likes
02-09-11, 16:38 GMT+10#194 UPDATE: Back to the Future...actually Post 128.....
*SIGH*
Just spoke to the guy that's doing my cabin and quite a lot of the work in post 128 of this thread has to be redone.
The stereo is half hanging out where the entire dash was taken out to put a new heater core but the engine guys didn't know how to fit it all back. Not a problem as the dash had to come out anyway for the TomTom dash.
The Boost gauge pod has to be re-fitted as it must have been moved when the dash came out.
Horns and other bits don't work and it's a mystery as to whether the strips for the parking sensors were fitted.
I will see a lot of red if them bumpers have to come off again.....
0 likes
07-09-11, 16:27 GMT+10#195 UPDATE: BEHOLD - The first PURPOSE BUILT digital speedo for a VL!!!
Well almost...still need to install it into EVILPET but everything works. It was test benched earlier today.
The digital speedo unit now works with the LEDs I got made up in China.
As you can see the lumens is about as bright as the VL dash clock. However I'm going to add a regulator dial switch so I can adjust the brightness manually to match it exactly.
The switch I made up (which I was not happy with) is being replaced by an actual VL cruise control switch which is being modified for the purpose (ie. MODE, UP and DOWN). I got some decals made up for the speed alert which I'll cut from the template and "surgically insert" into the cruise control switch.
Now it turns out that the parking sensors were installed in the bumpers so that's one less worry I have.
Some original photos have not been recovered yet.
0 likes
07-09-11, 18:14 GMT+10#196 When are you going to release this as a kit?!
Some original photos have not been recovered yet.
0 likes
07-09-11, 19:26 GMT+10#197 Quote:
Originally Posted by Gab dH
[View Post]
When are you going to release this as a kit?!
Not for awhile. I have not the time to put them together and test. It's taken 5 man days to get this right for one unit. I'll be looking for a contracted party in China or Thailand to put it together, test and complete as i havent the time nor able to control the quality doing it myself. Furthermore, there's the switch. I really think I have to source proper cruise control switches to do this right. So that's 29 switches I need to find.
---------- Post added 08-09-11 at 06:48 ----------
UPDATE: More on the VERY FIRST PURPOSE BUILT DIGITAL SPEEDO for the VL
I ended up getting a speed alert unit from a VN which I'm promptly pulling apart for the speaker. Cost $4.50 (Kudos to eBay!!!!) but postage was $8.50 (Australia Post YOU SUCK!!).
As mentioned previously I want this to look and sound as AUTHENTIC to Holden as possible.
Because I'm pretty stoked that nearly after a year from the time I sat in my nephew's HSV, admiring his dash, and coming up with the concept, talking about it on forums, through design, more talking about it on forums and some really cool people sending me photos and bits to play with in the designing, through to sourcing the electronic components, then the program itself (and learning how PIC micro-controllers work in the process), manufacturing custom dash fascia parts in the UK and the LEDs in China, it's nearly all done so I'm posting more photos of the digital speedo at work.
This should be installed next week.
The "Err" code below is what happens if the signal is lost from the tail shaft - could happen if the car hits a big bump and the tail shaft moves beyond the magnetic distance from the sensor underneath the car. This coming summer I'm going to adapt it to signal from a hall sensor and be done with the magnets and tailshaft sensor altogether. I have to confirm with the programmer that there's no additional coding that's required. I don't think so BUT I'm going to check anyway.
The message below is "Calibration mode" where the analogue speedo is calibrated with the digital speedo. Literally take the car to 100kmh and hit CAL and its done. Simple as that.
UPDATE: Custom Polished Strut Top Covers
I found a "metal wizard" in Sydney through a mate who made these up specially. We made up the AERO template and got it laser etched.
I think they turned out awesome. Whaddyareckon?
Going to be fitted this weekend.
Stay tuned....more photos to come in the next few days......
Some original photos have not been recovered yet.
0 likes
12-09-11, 11:58 GMT+10#198 blown away every time this thread is updated!
0 likes
18-09-11, 07:45 GMT+10#200 UPDATE: Unimpressed
I've been back in Perth now for a day. Have to admit the paint and engine looks great!
However, quite a bit of carelessness means I'm back to square one on the cabin;
The dash wasn't taken apart and reassembled properly when the heater core got fixed.
- boost pod is warped from when it was pried off
- gear indicator / shift light does not work
- air cond (brand new) doesn't work nor does the heater / vent fan and the heater is continually on. Can't switch it off.
- speedo does not work
- grubby hand marks all over reupholstered velour
- carpet needs steamcleaning as oil stain marks
Other
- clutch fluid leaking
- car is a bitch to start cold - have to pump the accelerator like an old carby style engine to get things started
- car horn is sorta stuffed and doesn't sound right
I literally got off a 20 hour flight got into my car, drove it to Briffa and got the speedo fixed.
Digital speedo goes in tomorrow and I'm supervising and assisting in the install.
Car goes back to Briffa Tuesday to get as much of the above fixed. So much for coming back for a holiday!
Quite gutted right now.
0 likes
